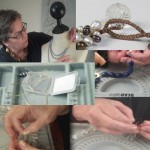
This week-end my little company released the “Advanced Pearl and Bead Stringing” DVD.
This DVD was a long time in the making. I had developed the earlier “Professional Pearl and Bead Stringing” 2-voloume course long before we used it as the basis of a set of DVDs. I taught it dozens of times over the years and was satisfied — based on the reactions of my students — that the material was presented in a logical and easy to understand sequence for beginners. What remained was to gear myself up for appearing on video (easier said than done) and determining and organizing the key material to fill in the blanks for beginners. (For example, the chapter on the strengths and weaknesses of various threads.)
The Advanced DVD was an entirely different matter. Although I’ve used the techniques included in the DVD for years, I hadn’t taught them. So, I had to determine which techniques would have broad enough value for the pearl and bead stringer with basic skills and then determine how to present them. This involved multiple takes on the part of my long-suffering videographer and my own simmering impatience–with myself.
But this is sausage making and not important to you. I believe the “Advanced Pearl and Bead Stringing” DVD covers key areas of importance to professional pearl and bead stringers. Here is a chapter by chapter discussion.
- Double Knotting — While assembling the DVD, I noticed I sometimes handled the beads differently than I demonstrated in the beginner volumes. That’s because I was double knotting. I included a very short chapter on how to double knot — not really an advanced technique, maybe more an intermediate one — but I wanted to ensure viewers understood everything I was doing.
- Endless Necklaces — Professional Pearl and Bead Stringers must know how to create endless necklaces. Once the concept is understood, then like everything else, it’s a matter of practice.
- Adding Thread — This was a technique I developed for myself and I’ve never seen it taught before. I use it for two purposes. First, to correct mistakes if I’ve incorrectly estimated the amount of thread I need for a piece of jewelry and it’s been invaluable for this. Second, and just as important, I use it to help solve manufacturing issues if I’m using beads with differently sized drill-holes.
- Combining techniques — I developed a short segment showing viewers how these two techniques could be combined. I’ve included that segment in the video on the home page of this site.
- French wire — Because thread today is so durable, the protective properties of French wire aren’t quite as important as they were years ago. So its use is often a design choice or — and this is important – one that a client will insist on. It’s a piece of cake. I demonstrate it and also include a demonstration of how French wire can be used to support a design.
- Fringes — Necklaces fringes can be important design elements. Creating them often involves using two needles. I walk through a number of different fringes with tips on how to best manufacture them.
- Macrame — Pearl and bead stringers often reach into different niches for solutions in their own niches. For some time early in my career, I didn’t use macrame. However, there came a time when I had a design issue that the square knot could solve. I walk through the square knot and show how I use it to create good looking clasps.
- Graduated necklaces — We see various formulas for creating graduated necklaces, adding a certain amount of length, for example, or using the beading board. I’ve used them both and have been disappointed and I know other pearl and bead stringers who have had similar experiences. That’s because these formulas, in my experience, can’t account for the size the beads or the width of the clasp. I show you how I create graduated necklaces and provide you with tips on creating torsades which have become a favorite necklace style for me.
When I began assembling this material for the DVD, I found I couldn’t include a relatively long section I’d done on special knots. These knots include the Lark’s Head, the Clinch Knot and the Grinner. I use them for attaching pendents (with and without jump rings) to a cord and for tying knots at the clasp. These techniques aren’t strictly “bead stringing,” but I’ve found them extremely useful over the years.
So I created another DVD which includes this chapter and a chapter on polyester upholstery cord, a material I’ve relied upon for many years for its ability to carry weight without stretching and for tensile strength. I think this is very valuable information for the professional pearl and bead stringer and I include this “Special Knots and Materials” DVD as a bonus with every order.
I hope these new DVDs, together with the earlier beginner DVDs, will serve the community of professional pearl and bead stringers by helping to providing the knowledge and skills for a lifetime. I’d love to hear any comments or criticism. Please e-mail me at fleury@fsommers.com.
For pricing details for this new DVD and how you can obtain the entire set of DVDs for a special, reduced price, please click here.


